Story and photos by Paul Wilson
Once the chassis of my Alfa was sitting on its wheels I could start on the fun part, building the body. Over many years and several major projects, I’ve developed methods of fabrication that work pretty well for me, but it’s important to understand what my situation is, what my goals have been, and the limitations of my system.
I’m a home hobbyist, with a limited budget. My net outlay for the equipment used on my earlier efforts–a cheap MIG welder, an English wheel, hammers and a sandbag–was maybe $1000. For aluminum, I had to get a TIG welder, and a sheet metal brake. Later on I found that a foot-operated shrinker was a huge help. So costs did go up, but weren’t excessive. A 4 x 8 foot sheet of 20-gauge steel, enough to make a fender and keep me busy for several weeks, costs $73. It’s not an expensive pastime.
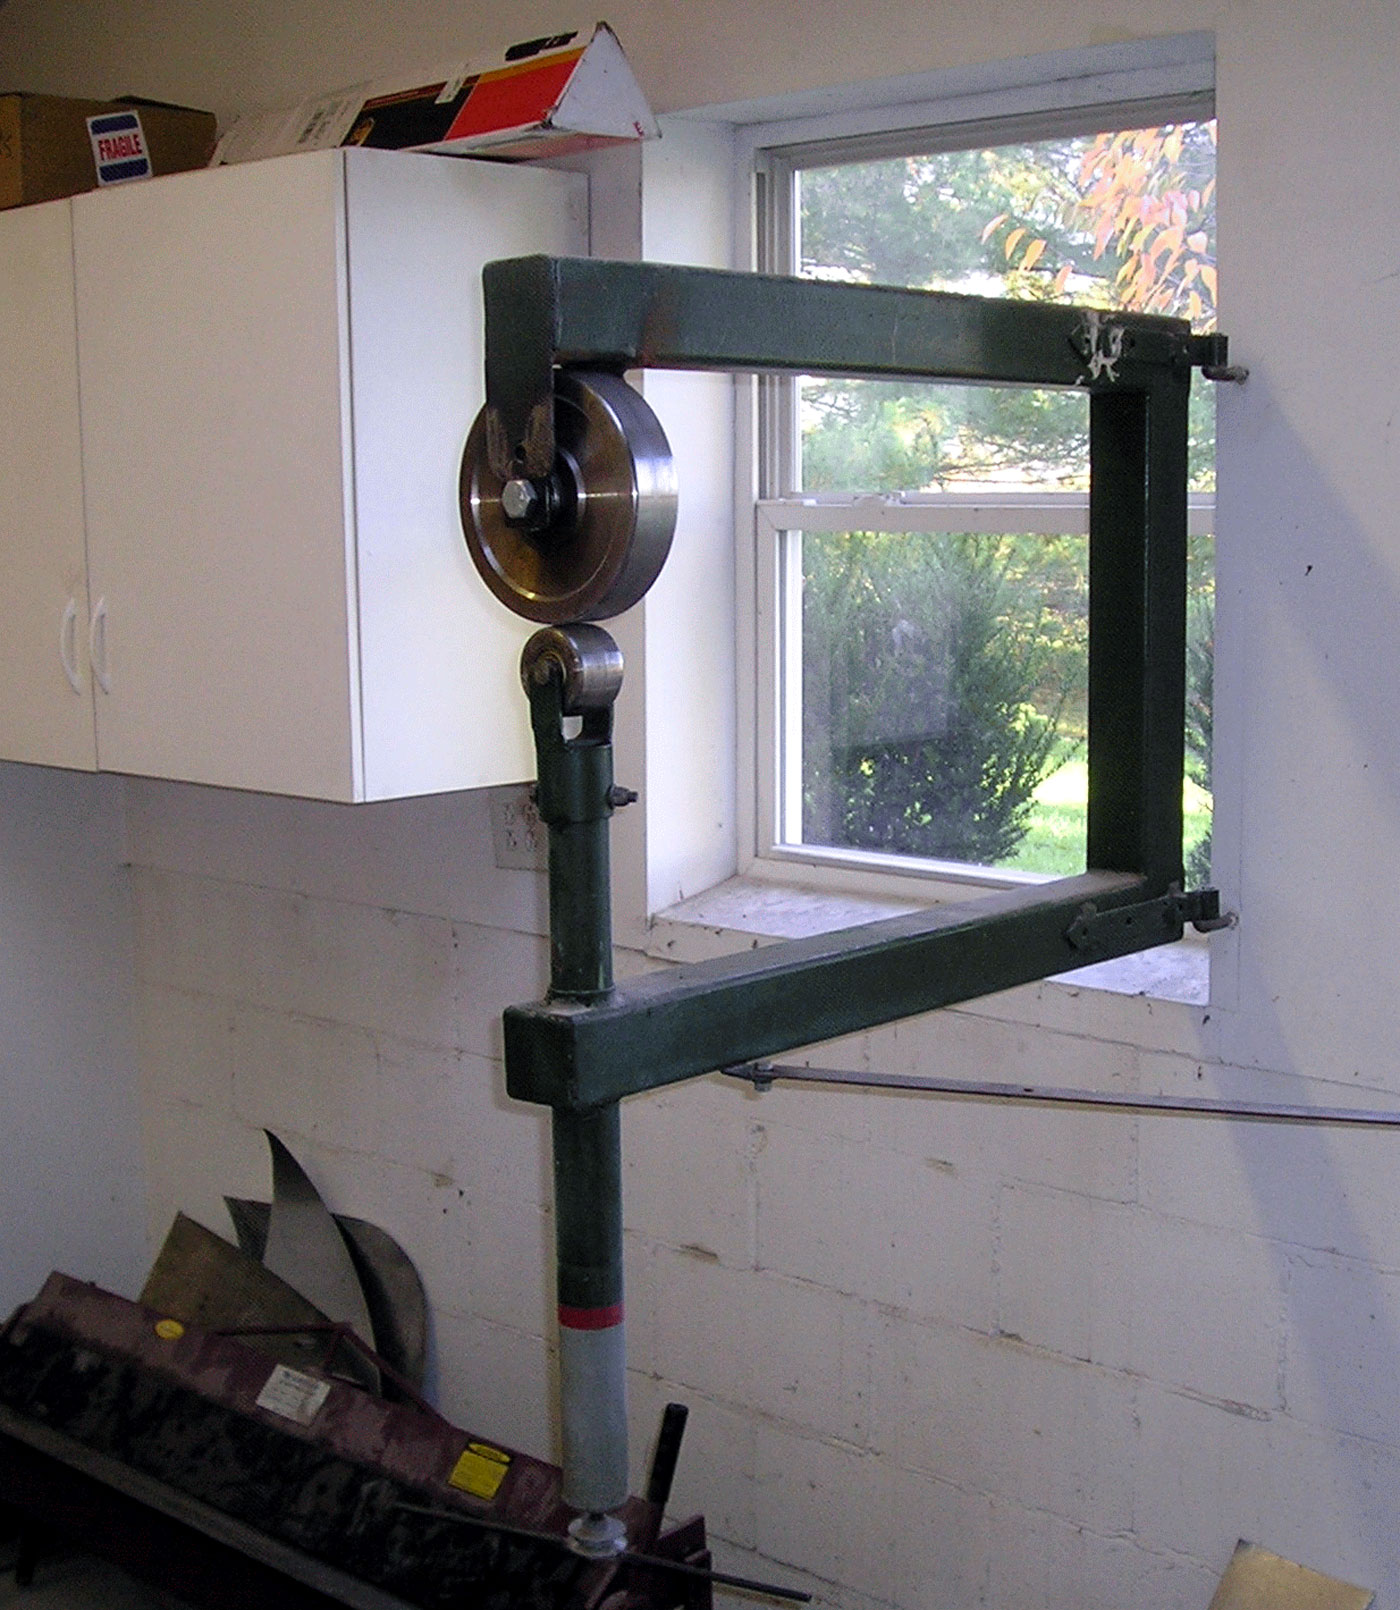
Space is also an issue for anyone working in a home garage. My shop is 30′ x 18′ (10m. x 6m.). I mounted my English wheel on a frame mounted on hinges that bolt to the wall, so when not in use, it can swing out of the way. Sitting on dollies, the welders can be moved where needed, or tucked in a closet. The brake and shrinker aren’t bulky. So even with cabinets on two sides, and a large bench, my shop leaves plenty of room to work around a car.
I’m lucky to have a good place to work, and a couple of thousand dollars for tools. But this is hardly the vast outlay and the palatial setting some assume is needed to fabricate a car body. What’s the result, though? Can an elderly ex-English professor, working with simple tools in his garage, match the craftsmanship of a three-man team of specialists, using laser scanners and CAD equipment, with a budget of $1/2 million? Of course not. In fact, any decent-sized hot rod show will have better examples of expert bodywork. And if your goal is to sell replacement fenders to hyper-critical Porsche restorers who will angrily reject anything that’s half a millimeter off, my approach won’t work.
But my aim was to imitate late-‘40s Italian coachbuilders, so the real question is, what was their standard? When restoring my Touring-bodied Alfa 1900, I got a grille eyebrow and a door from a parts car. Neither fit well enough to be usable. Once I examined a Vignale-bodied ‘51 Ferrari in bare metal, up on a rotisserie. One headlight was an inch higher than the other. A guy who’d restored an original ‘60s Ferrari race car–every extra gram is critical, right?–told me he’d filled a trash barrel with bondo he took off it. So I shouldn’t have been surprised when after years developing my own system, I discovered that it was almost exactly what the Italians used. The result is pretty good, but not perfect. It’s no wonder that it costs a fortune to “restore” –that is, recreate to mathematical precision that they never had–these cars to Pebble Beach standards.
Two basic puzzles face the wannabe coachbuilder. First, what do you form the body panels over, as a guide to their contours and dimensions? Out of thin air, you’re making a complex structure that should be symmetrical within a fraction of an inch. We’ve all seen pictures of those full-sized wooden bucks. But even if you spent the $20K I’m told one might cost, it isn’t a good solution. It’s a massive, immovable lump. It’s hard to modify. And it doesn’t give good access under the panel you’re working on, so you can’t see if there’s a good fit. But what else are you going to use for a pattern? The other problem, of course, is how you make complex shapes out of a flat sheet of metal. And what kind of metal is best?
I stumbled towards the best answers through a series of projects. My first effort was a nose for a Lotus Eleven. For a buck, I borrowed from a friend an accurate replica nose made with thick fiberglass. A battered original nose showed me how it was made with a patchwork of smaller panels that were welded together. The right grade of aluminum, annealed, is very easily worked. To stretch the metal, I hammered dents into it over a sandbag, then rolled it smooth (“planished” it) in the English wheel. If the wheel is adjusted tight, just pulling metal through it can create a shallow crown. At the time I had a just a small shrinker, that I used a few times to tighten the edges, but most of the shaping was done by stretching the metal.
The result was acceptable, but the process was far from ideal. Welding with a Miller Econotig was extremely slow and difficult. I constantly blew holes in the metal, and the lumpy welds that filled them took ages to grind off. I could never get those areas smooth. If I overdid the bulge on a fender top I could tap it down, but I had no way to shrink a wave on a flatter part. The borrowed fiberglass nose didn’t allow me to check the fit of the metal on the surface, but it served well enough as a buck. What was I going to use next time, though, to form another shape?
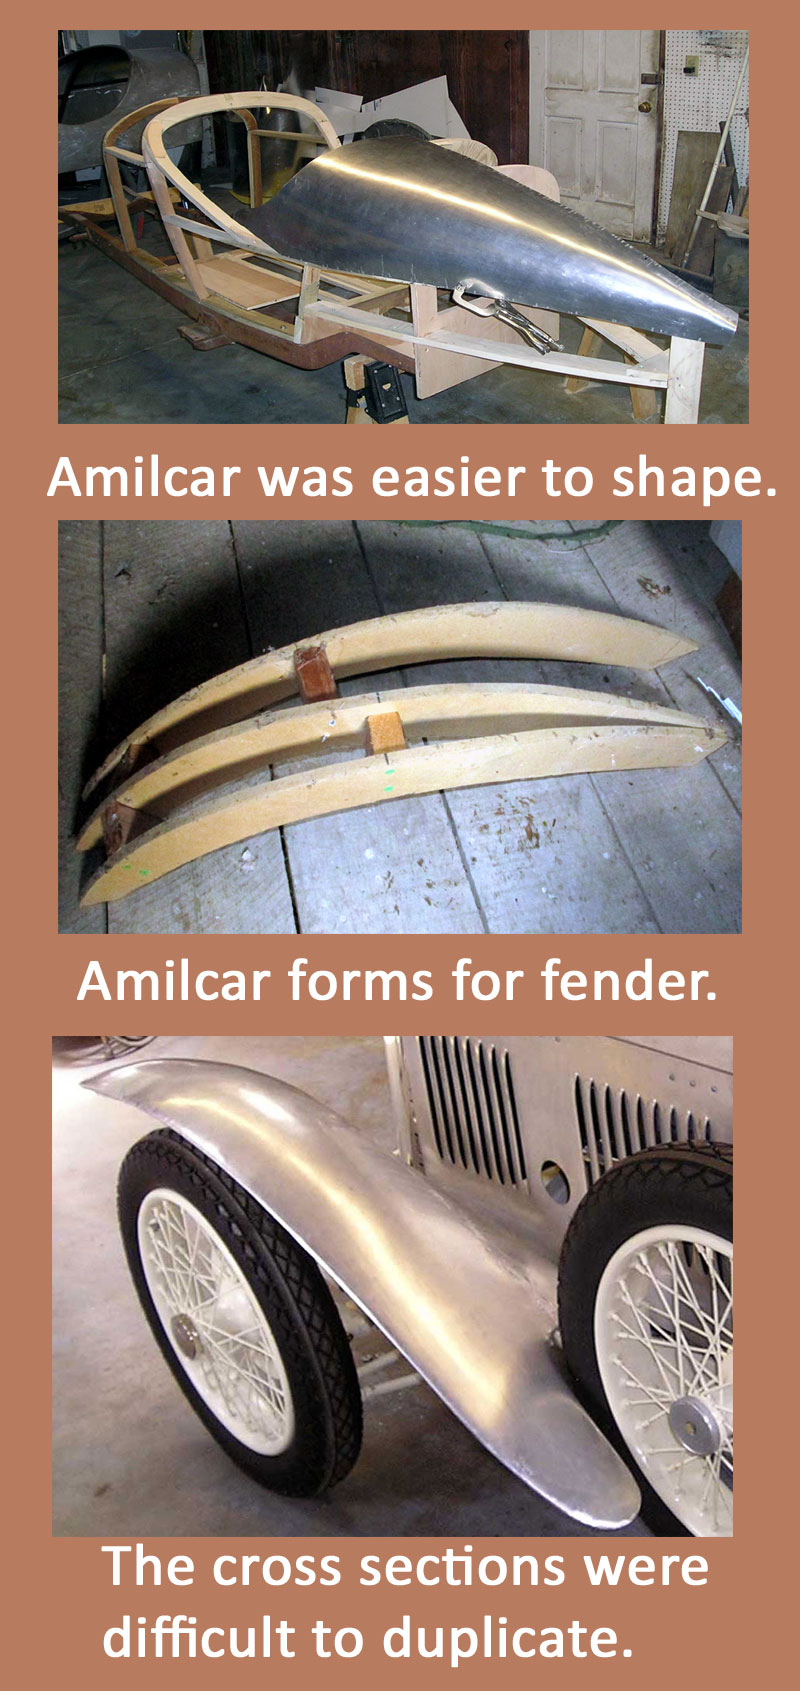
I made no real breakthroughs on my next attempt, a boattail body for one Amilcar and fenders for another. The aluminum body skin covered a wooden frame, which provided a ready-made buck. The shapes were much simpler than the Lotus nose. I made wood structures to form the aluminum fenders over, and while I could easily duplicate the lengthwise profiles for the two sides, the cross-section accuracy was hard to control. Screwing together pieces at different angles with wood blocks is clumsy and imprecise. My welds were still lumpy and messy.
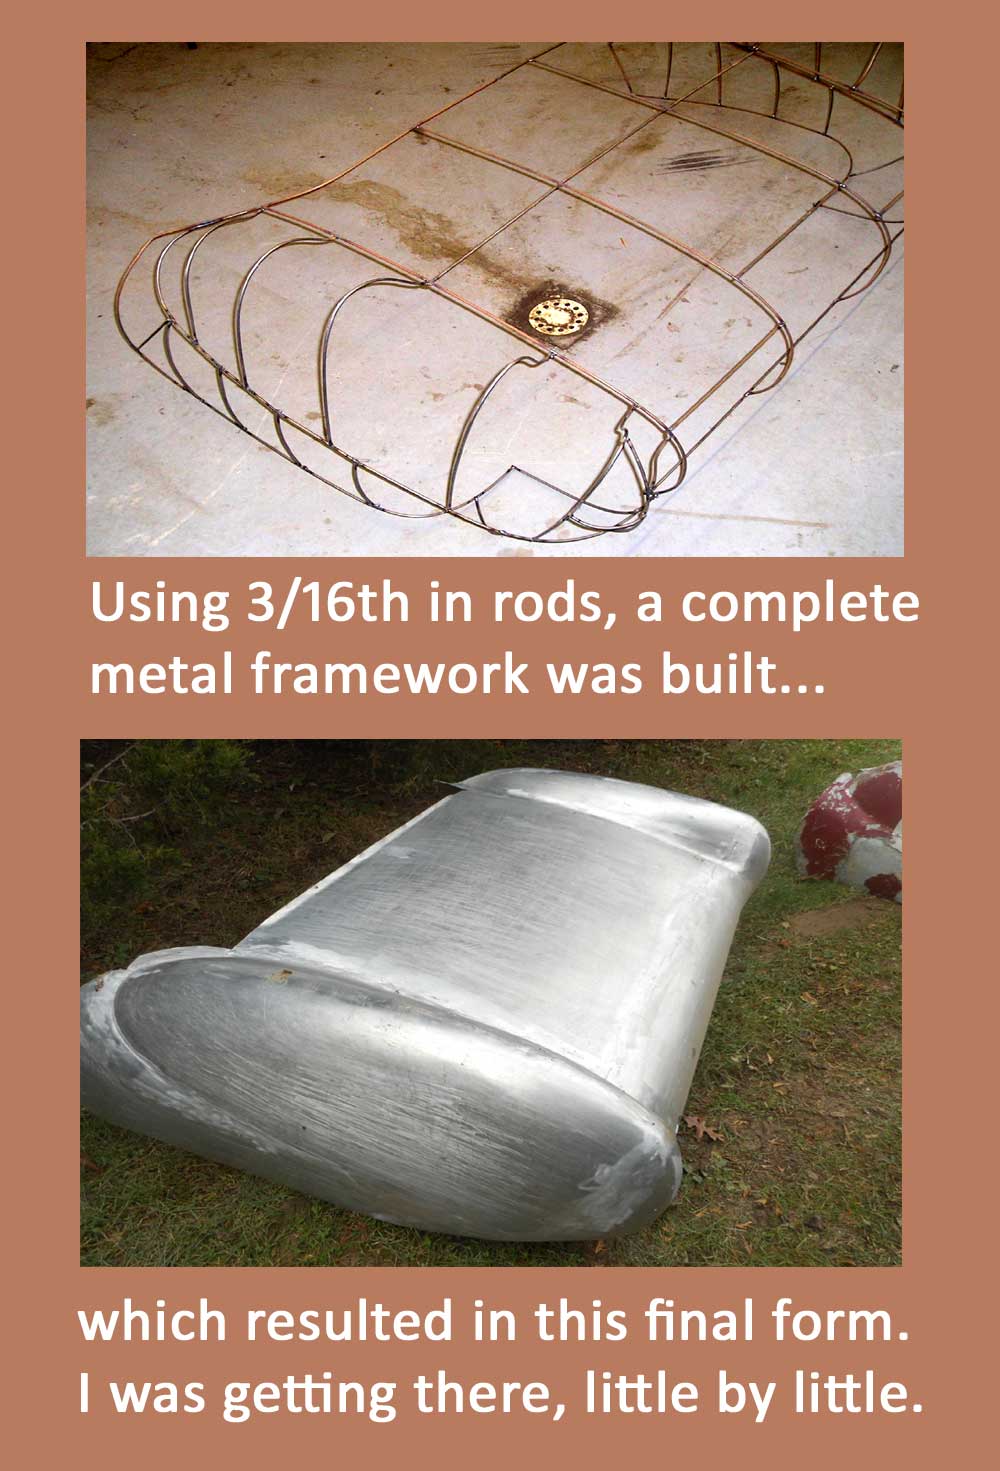
I made some valuable discoveries doing a tail section for another Lotus Eleven. I had its original body, and while it was too ragged to use on the car, I could make a wire form inside it to duplicate the shape. Using 3/16″ rods, I welded up a buck. It was easy and quick to make, and light enough to turn upside down so I could work in whatever position was convenient. I could easily check all the profiles for symmetry.
Clipping the panels to the buck revealed even slight inaccuracies in their shapes. The ghost form could even be mounted on the car’s chassis to preview its appearance and fit. Still working in aluminum, I kept making ugly welds. I also found that 3/16″ rods were not stiff enough: if I pulled a panel to make it fit, was the panel bending, or the buck? The system needed refining, but I was getting close.
When I started on the body for my Alfa 6C2500 roadster, then, I had done a long apprenticeship. A few more important discoveries awaited me, but I was getting close to having efficient fabrication methods that would give good results.


Nice story about great work. Somewhere between engineering, design and craft. Maybe even art! Clearly the Humanities (Paul being an ex-English prof) is good training for almost anything,..or everything!
Mind bending stuff …
Amazing !
Regarding symmetrical shape & side to side, my father used to say the man wasn’t born who could see both sides of a car together so no one worried about it too much.
If gas welding aluminium we used to cut a filler rod from whatever sheet we used.
Most people get their “eye in” to gauging shapes, it just takes a while.
Italians used to cover the whole body in bondo or plastic filler as we say, before that they used buckets of cellulose stopper. In UK weather it never went baked enough so we did not use it so much. My 1900 Touring bodies had it in sheets easy sixteenth inch thick. Most guys here had a piece of tree stump & the leather bag of sand, hammer & dollies. English wheel was expensive. I like what you do.
Very nice to read this detailed “behind the scenes” story of how you developed your forming process…to suit your situation and resources. Great story, thanks!
Thank you so much, Paul, for opening your garage to us. It’s impressive to see what you have done there.
Mind bending indeed- very good!
There is much to learn from Paul’s sterling attributes in achieving such success
Paul is skilled in two essential areas. He is a skilled metal man and he is also so skilled at English that he can communicate the complex art with us. Thanks Paul for these great stories illustrated with good photos.
It seems to me the missing word is – “persistence ” – looks like plenty of sweat, sore fingers, determination and persistence . Salutes to you Paul….
I can’t wait to see your solution to the too flexible 3/16 wire psoblem.
Stainless steel would be my choice instead of mild steel…..corrosion proofing of mild steel is a MUST whereas stainless steel there is no need [ by and large ]. Stainless steel is easier to weld as its melting point is lower that than of mild steel. Cleaning the welding “blue” left by the operation is essential. As Stainless steel has a higher strength than mild steel, thinner gauges can be employed BUT working stainless is a different prospect. It will work harden thus becoming even more stiff but this can be alleviated by playing a flame on the area to soften / anneal. I am a metallurgist [ or was to be more accurate ] and rust/corrosion is my enemy when working with metal. All told Paul, your skills are very much to be praised.
I can relate to the buckets of Bondo after stripping a Maserati
3500 GT. It appeared that the body panel fabricator got the metal close and finished with body filler. I remember using at least 3 gallons of Aircraft paint stripper.