
Story and photos by Paul Wilson
From the VeloceToday Archives, November 2021
Readers may have already guessed why this series has stalled: the story has caught up with progress on the car itself. I spent the Pandemic Winter pushing a sanding board, then it went to a paint shop, from which it has just returned. Now as I start on the reassembly, wiring, making and trimming the interior, and sorting out mechanical issues, I’ll have more to write about.
I didn’t tell about constructing the center body, which presented more dilemmas than I expected. I thought, how hard could it be? It’s just two boxes, one ahead of the cockpit and the other behind it. Just make them light and stiff, and what else is needed? A lot, as it turns out. Most of the problems arise from what comes in between: the doors and the rocker panels. Often there’s a chicken-and-egg dilemma: if two pieces have to fit together, which do you make first?
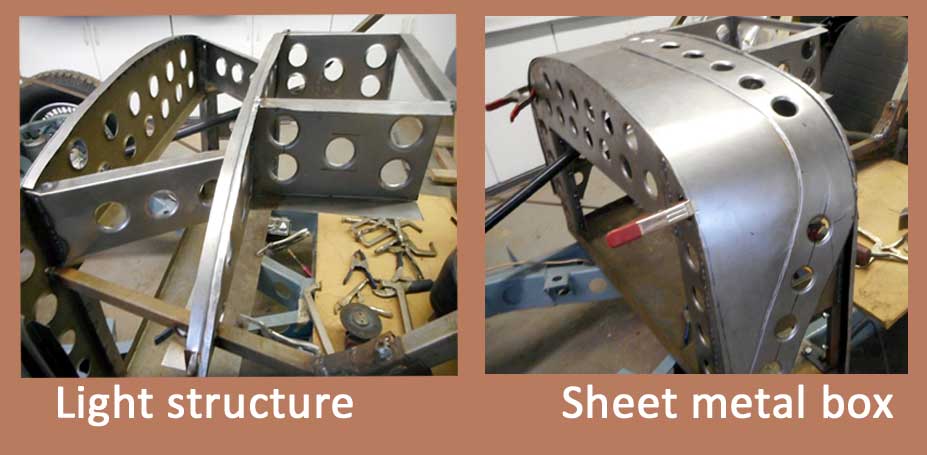
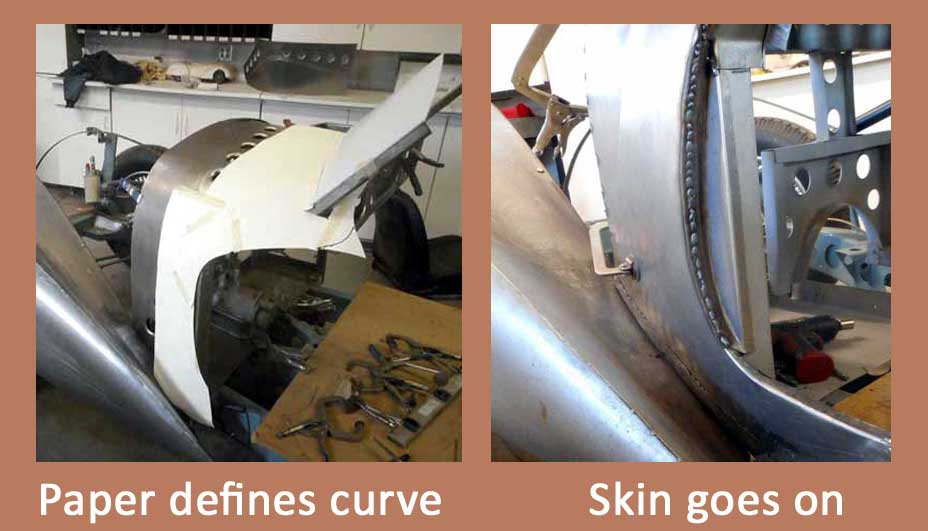
I began with the easier parts. On the 2.9 roadsters the firewall structure was made with thin steel bars, with diagonal bracing. But I decided that a welded steel box would be stronger and stiffer, and no heavier. Lots of big holes with flanged edges not only reduced weight, but also gave space for wires and cables to run through, and allowed access to fasteners for brackets for the steering column, wiper motor, and other small parts. And they look cool, like aircraft structures. The holes are quick and easy to make: drill a hole, fit matching punch dies above and below, and tighten the bolt in between. The whole cowl structure weighs just 37 pounds (17 kg.). With construction paper I made a pattern for the cowl skin and door opening, then put on sheet metal. I added a tidy cover for the door hinge pillar.
What was I going to do about the rocker panel? By themselves, the cowl and the rear body were light, stiff, manageable pieces I could remove for priming and rust-proofing. But connecting them with a weak door sill would make this impossible. How could I fill this gap later, when the other parts were already in primer? I’d solve this problem when the time came, I decided. It’s not always a bad idea to procrastinate.

Decisions about aesthetics, period accuracy, function, and ease of construction had to be made before I began the doors. Shut lines, in my opinion, have a big influence on a car’s appearance. Rather than aligning it with the firewall, I made the rear edge of the hood lean gracefully rearward. I wanted a curved line at the front of the doors, harmonizing with the fender shapes. But as with the taillights, period designers had just begun to pay attention to this feature. Some didn’t care: the Bugatti Type 57 Atalante has perfectly straight lines front and rear. Chapron and Figoni had rounded door openings at the front, at the price of putting the hinges at the rear, where a straight shut line was less conspicuous. On Touring’s 2.9 coupe the front-mounted hinges stick out at the bottom, fit into countersunk slots at the top; both look awkward. The solution, now taken for granted and gradually adopted in the late ‘40s, was hinges with long curved bars, made so that at the gap, the door moves outwards as it opens. The ones I got from a hot rod supplier allowed me any door opening shape I wanted.
I began the doors from the front, with a wobbly sheet metal shape with brackets top and bottom for the hinges. Then I filled in the space with a lightweight box structure.

At the top I fitted sockets for the side curtains, at the back I put the latch mechanism. Smoothly-operating door hardware, including beautifully chromed strikers, is available new (nothing reveals its Austin-Healey origins). Around the perimeter of the door frame, sheet metal following the outer body contours was trimmed for proper gaps. I could open and shut the bare frame, and adjust the latch.
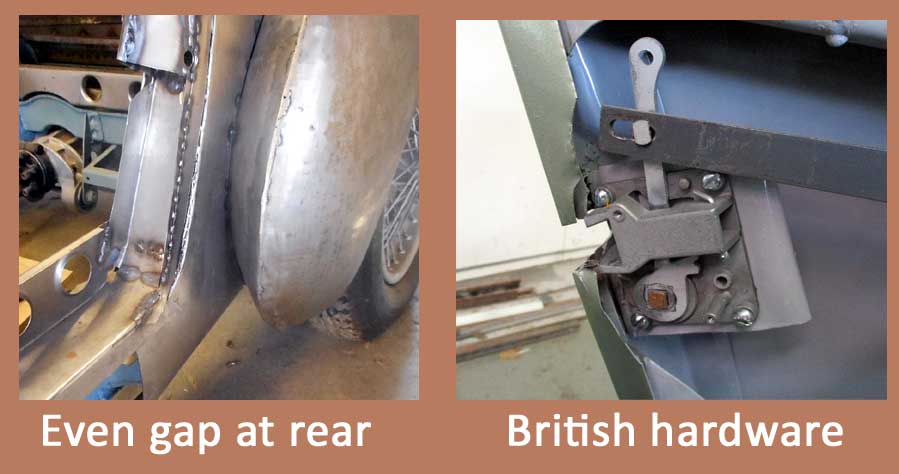
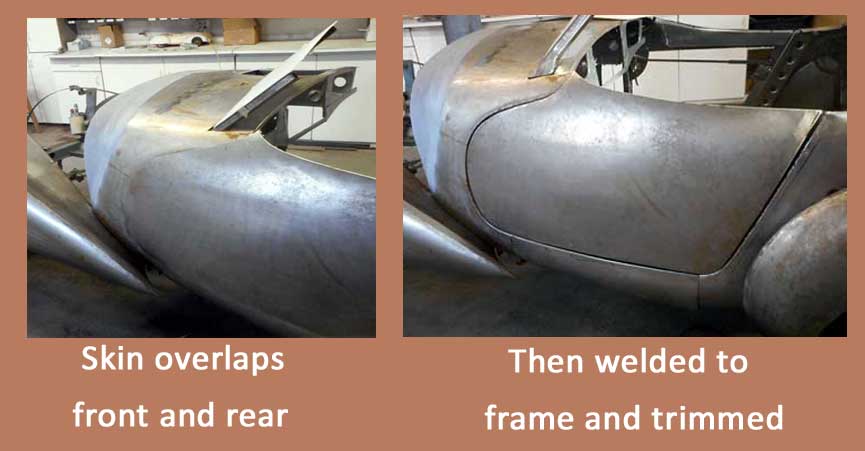
Before I attached the door skin, I shaped it as a separate piece, not only to fit the frame but to flow into the body lines in front of the door and behind it. Then I had to clamp it in exactly the right position, knowing that once the skin was welded to the frame, the door would be so stiff that any misalignment couldn’t be easily corrected.
Once the cowl, doors, and rear body were complete, I removed them, set them up in my yard, thoroughly cleaned and dried them, and applied self-etching primer inside and out. Internal areas were sprayed with gray enamel.
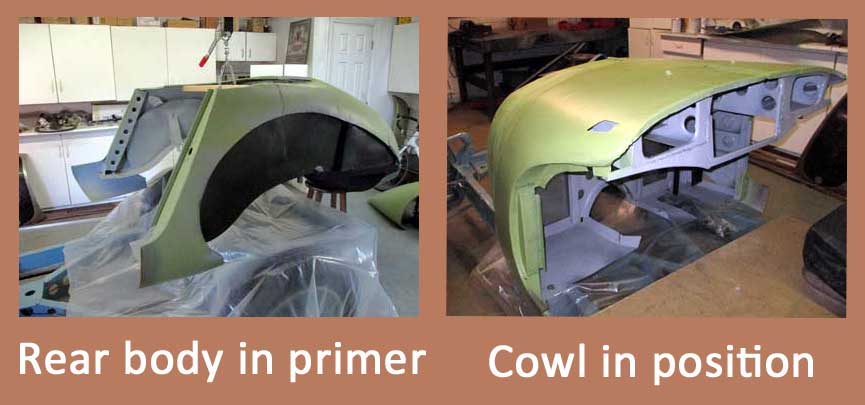
Oh, what about those door sills and rocker panels? I hadn’t forgotten them. Before removing the body, I shaped and fitted connecting parts for both sides, with overlapping flanges where they met.
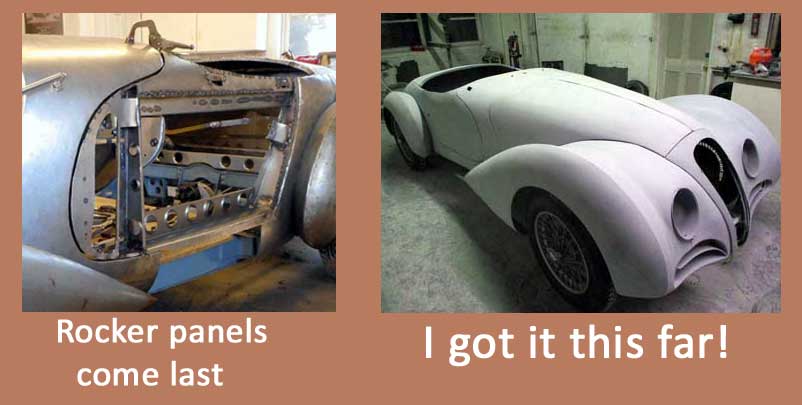
These I carefully taped, then gave the panels the same cleaning and priming. Once everything was reinstalled on the chassis, I clamped the panels in place and welded up the bare-metal meeting points. When these small areas were tidied up, the body was ready for the next step.
I’ve painted lots of cars in the past half-century. None have been show quality. Painters know a lot that amateurs won’t ever know till it’s too late. I did spend three months fitting panels, leveling up the surface with board sanders, etc., but the paint shop said I should have saved the effort, given what they ended up having to do. They were right, unfortunately. I’ve never been motivated to develop my painting skills to a high level, for several reasons. For one thing, painting isn’t make-specific. You don’t learn anything painting a rare Alfa you wouldn’t learn on a Chevy pickup. So it has no educational bonus. Two more things: a paint booth has obvious advantages over my yard. And paint has improved (but gotten expensive) way, way beyond what I used to play with.
Paying the painter doubled my net investment in the project, but the result is so beautiful that I can forget the financial pain. And now comes the best part: putting jewel-like pieces together. For the first time, I need to put on clean clothes before going to work. It’s still far from done, but I now dare to think it will be, before too long.
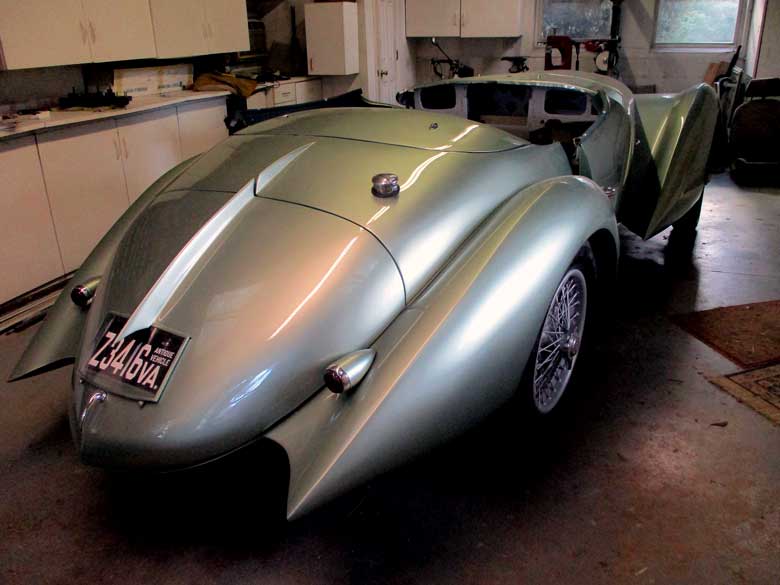
Looking promising…
Read Part 1
Read Part 2
Read Part 3
Read Part 4
Read Part 5
Read Part 6
Fabulous work, well done. Am rebuilding early Morgan +4 from a wreck, chassis upwards and appreciate your results. Ace magazine